
There's nothing like the warm, comforting aroma of Homemade Rustic Whole Wheat Bread baking in your kitchen.
This easy vegan recipe makes a flavorful, soft, and chewy round loaf using just five simple ingredients (no bread machine or Dutch oven required).

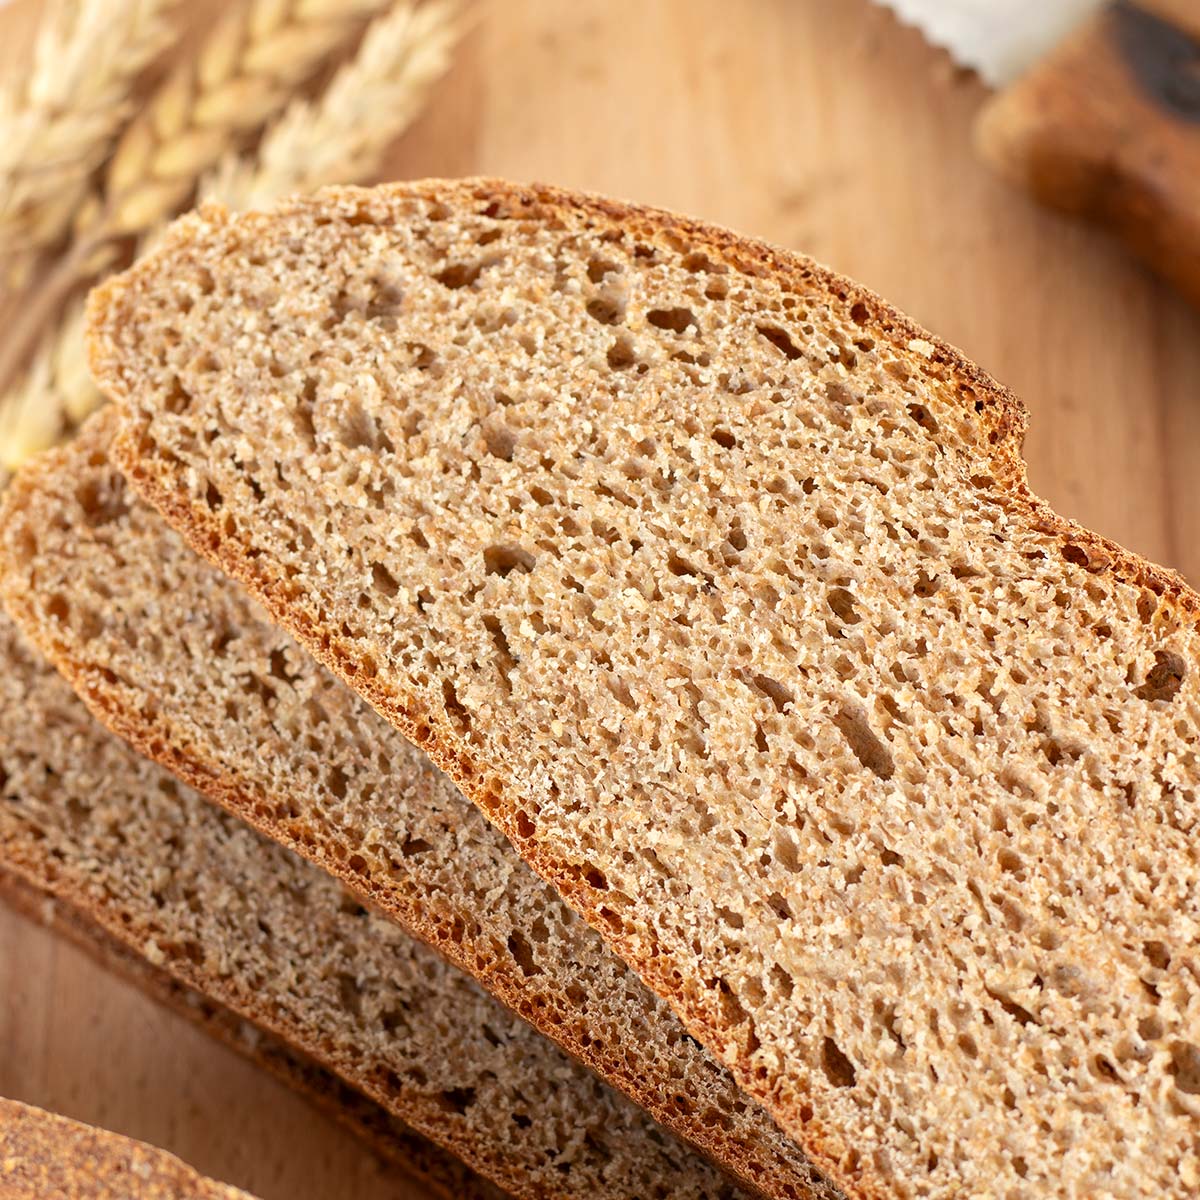
Rustic whole wheat bread is honestly the easiest homemade bread I make regularly in my kitchen. Baking bread from scratch used to intimidate me, too, but one quiet afternoon, I gave it a try-and let me tell you, I was so proud of that first golden, crusty loaf.
Trust me, once you bake it yourself, you'll never want to go back to store-bought again! It's incredibly simple and made with just budget-friendly pantry staples like whole wheat flour, yeast, sugar, salt, and water-no fancy tools needed.

I love pairing this versatile bread with everything from melty vegan cheddar slices for sandwiches to creamy cashew cream cheese for a quick snack to hearty mushroom potato soup, a smear of my vegan Nutella, or even alongside a warm plate of my tofu egg scramble for a wholesome breakfast.
If you love this recipe, be sure to check out my vegan yeast dinner rolls, dairy-free pita bread, and unleavened bread. They're just as simple, plant-based, and satisfying for everyday meals.
Jump to:
Brown Bread Ingredients

- Whole wheat flour adds a rich, nutty flavor and hearty texture while providing extra fiber and nutrients compared to white flour.
- Instant yeast makes the dough rise quickly and easily.
- Salt enhances the flavor.
- Sugar gives the yeast a boost to activate and rise more effectively while adding a subtle touch of sweetness.
- Lukewarm water is key to activating the yeast properly-too hot can kill it, too cold can slow the rise.
As always, you can find the full recipe with a list of ingredients with measurements in a printable recipe card at the end of this post.
How To Make Rustic Whole Wheat Bread

Step 1: In a large bowl, combine lukewarm water, instant yeast, salt, and sugar. Stir with a spoon until well mixed. Let the mixture sit for about 5 minutes, until it becomes frothy-this means the yeast is active and ready to work.

Step 2: Gradually add the whole wheat flour to the yeast mixture, mixing with a spoon until a shaggy dough forms. Once the dough starts pulling away from the sides of the bowl, transfer it to a lightly floured surface. Knead the dough by hand for about 5 minutes, forming a smooth and elastic ball. Place the dough back into the bowl, cover it with plastic wrap, and then a clean kitchen towel.

Step 3: Let the dough rise at room temperature until it has doubled in size-this may take 2 to 3 hours depending on the warmth of your kitchen (25-30°C / 77-86°F is ideal). The surface should be bubbly and the dough should look soft and slightly wobbly.
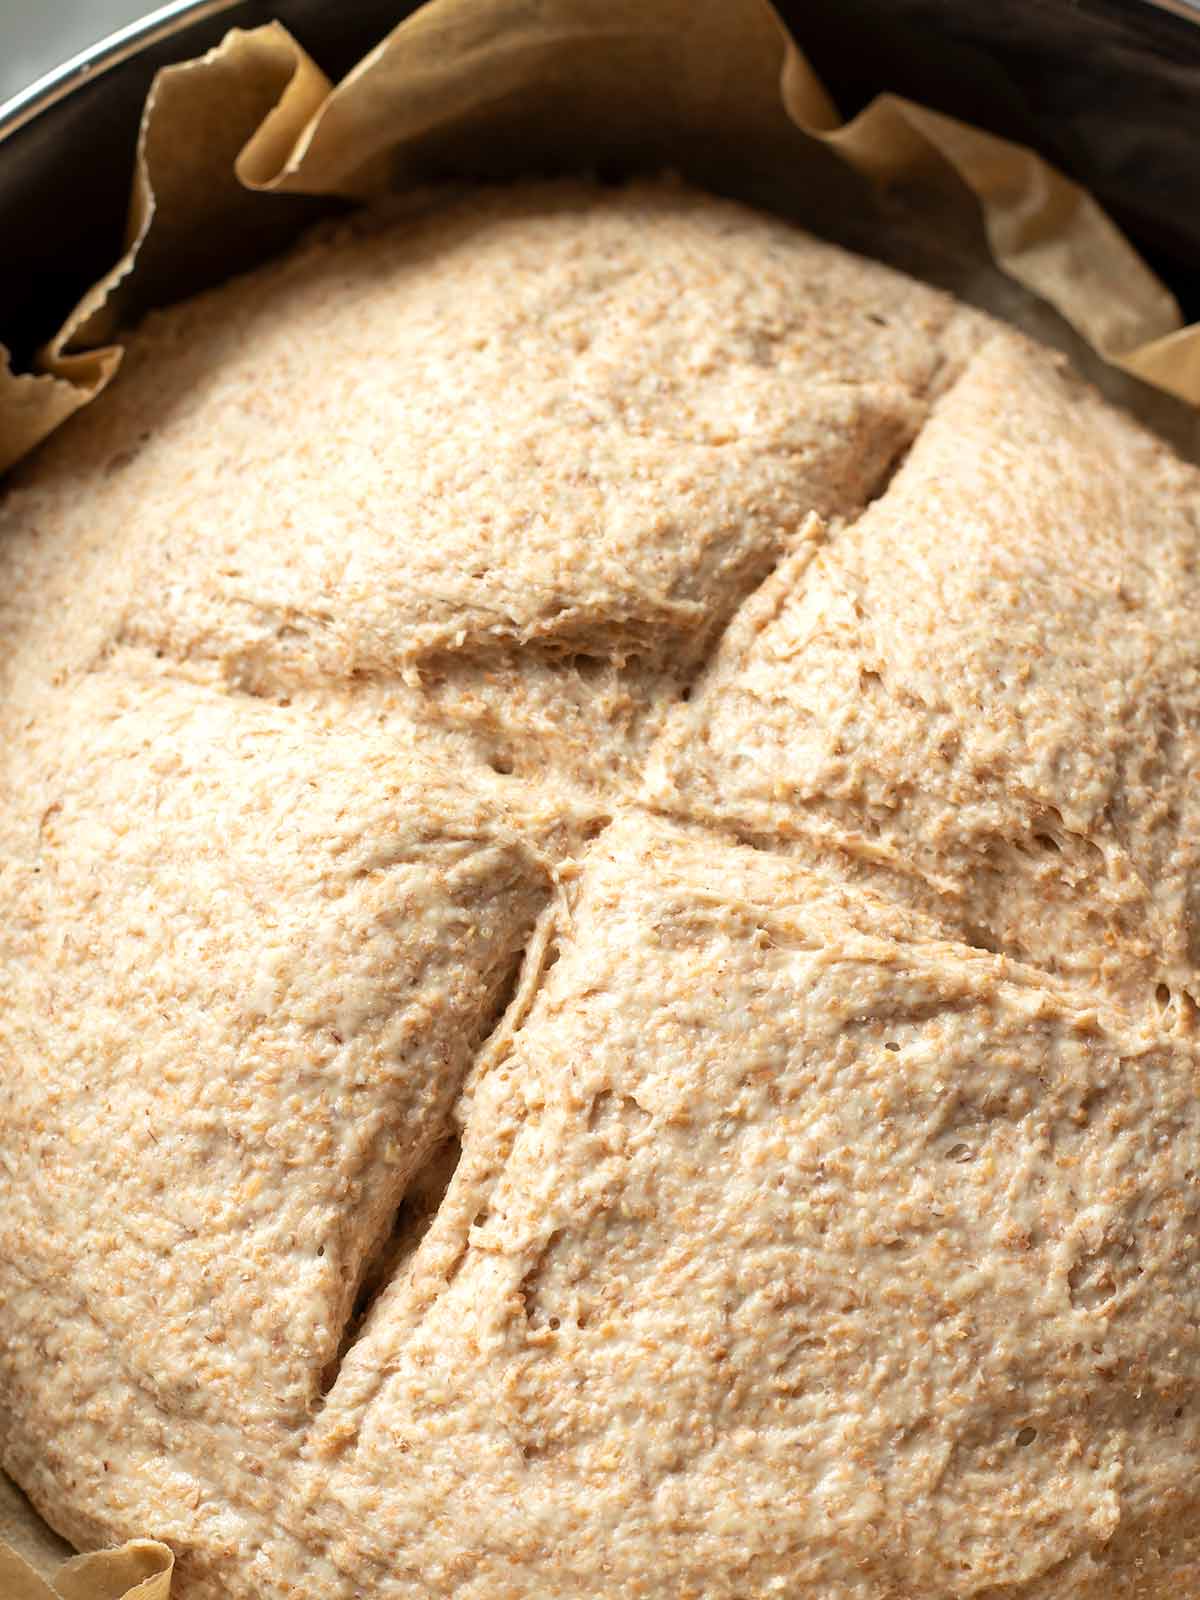
Step 4: Punch the risen dough down to release the air. Knead it again for about 2 minutes, then shape it into a ball. Place the ball in an 8-inch round baking pan lined with parchment paper. Make an "X" cut on the top of the dough. Cover the pan with a clean kitchen towel and let it rise for another 15 minutes.
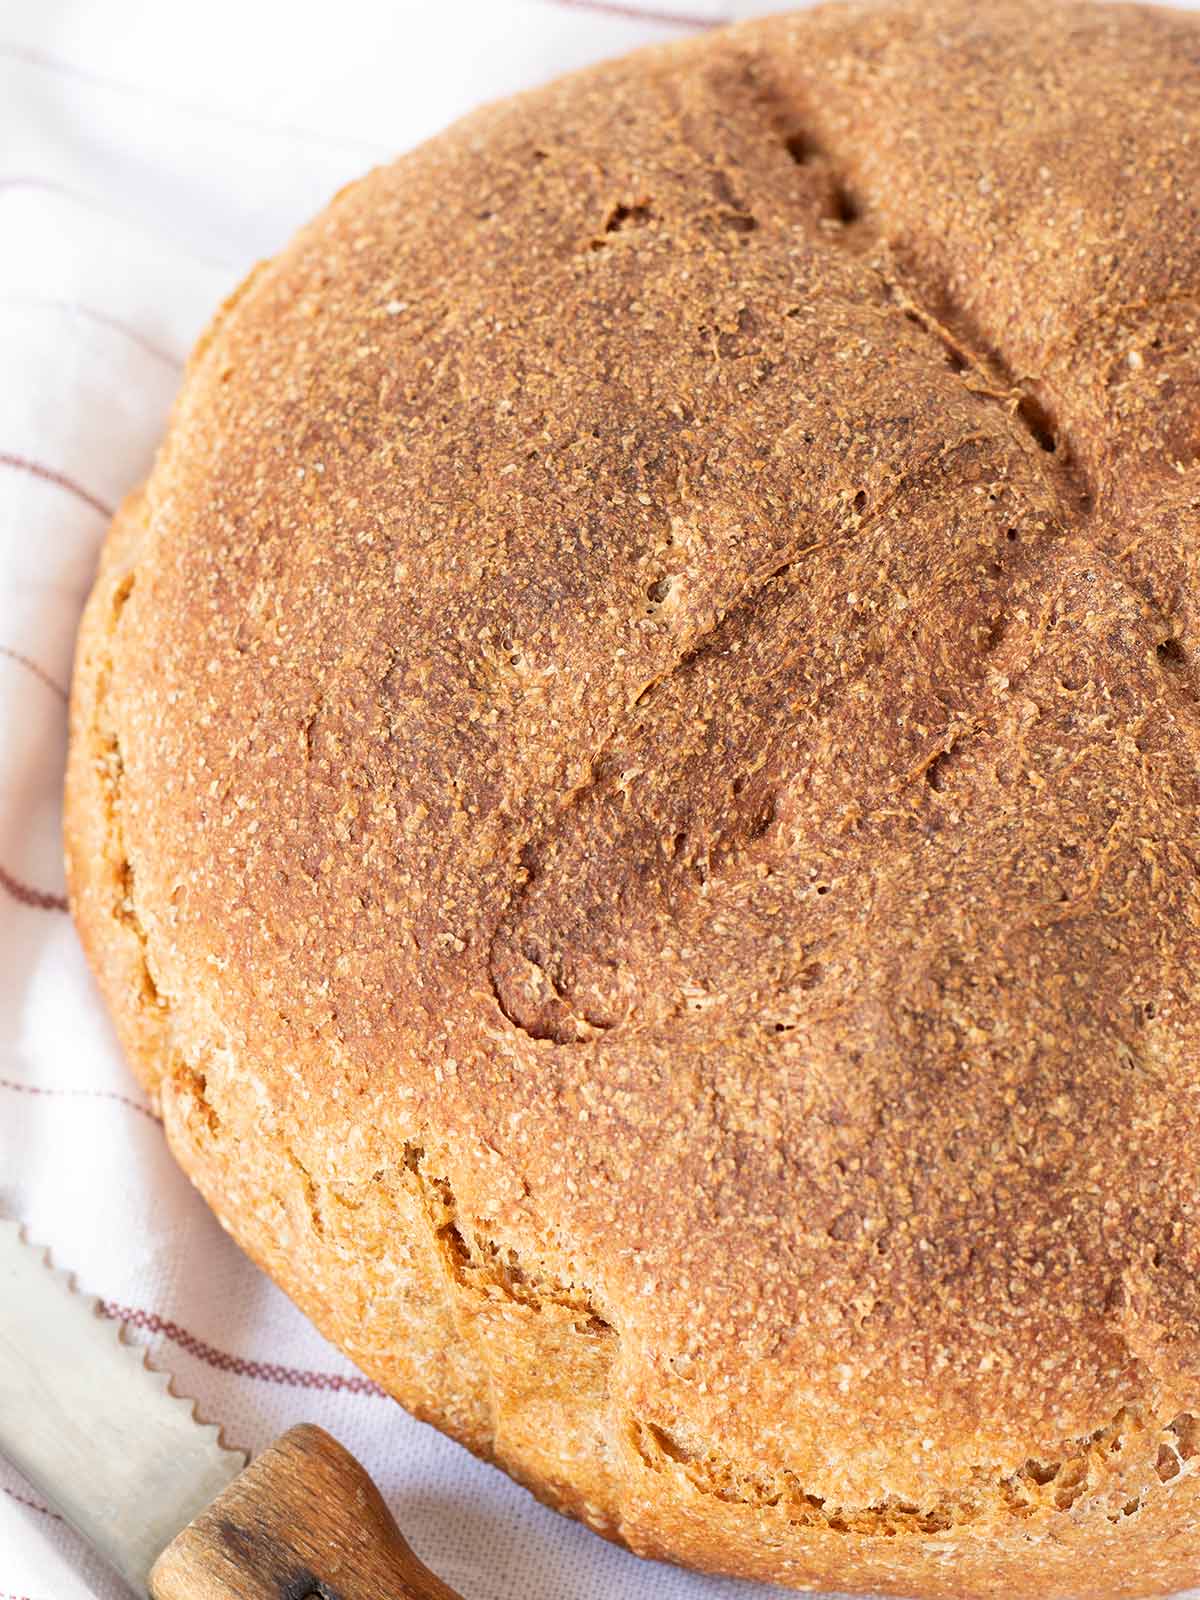
Step 5: Adjust your oven racks to the middle position and preheat the oven to 480°F (250°C). Bake the bread for 15 minutes, then reduce the oven temperature to 300°F (150°C) and continue baking for another 35 minutes, or until the bread is firm to the touch.
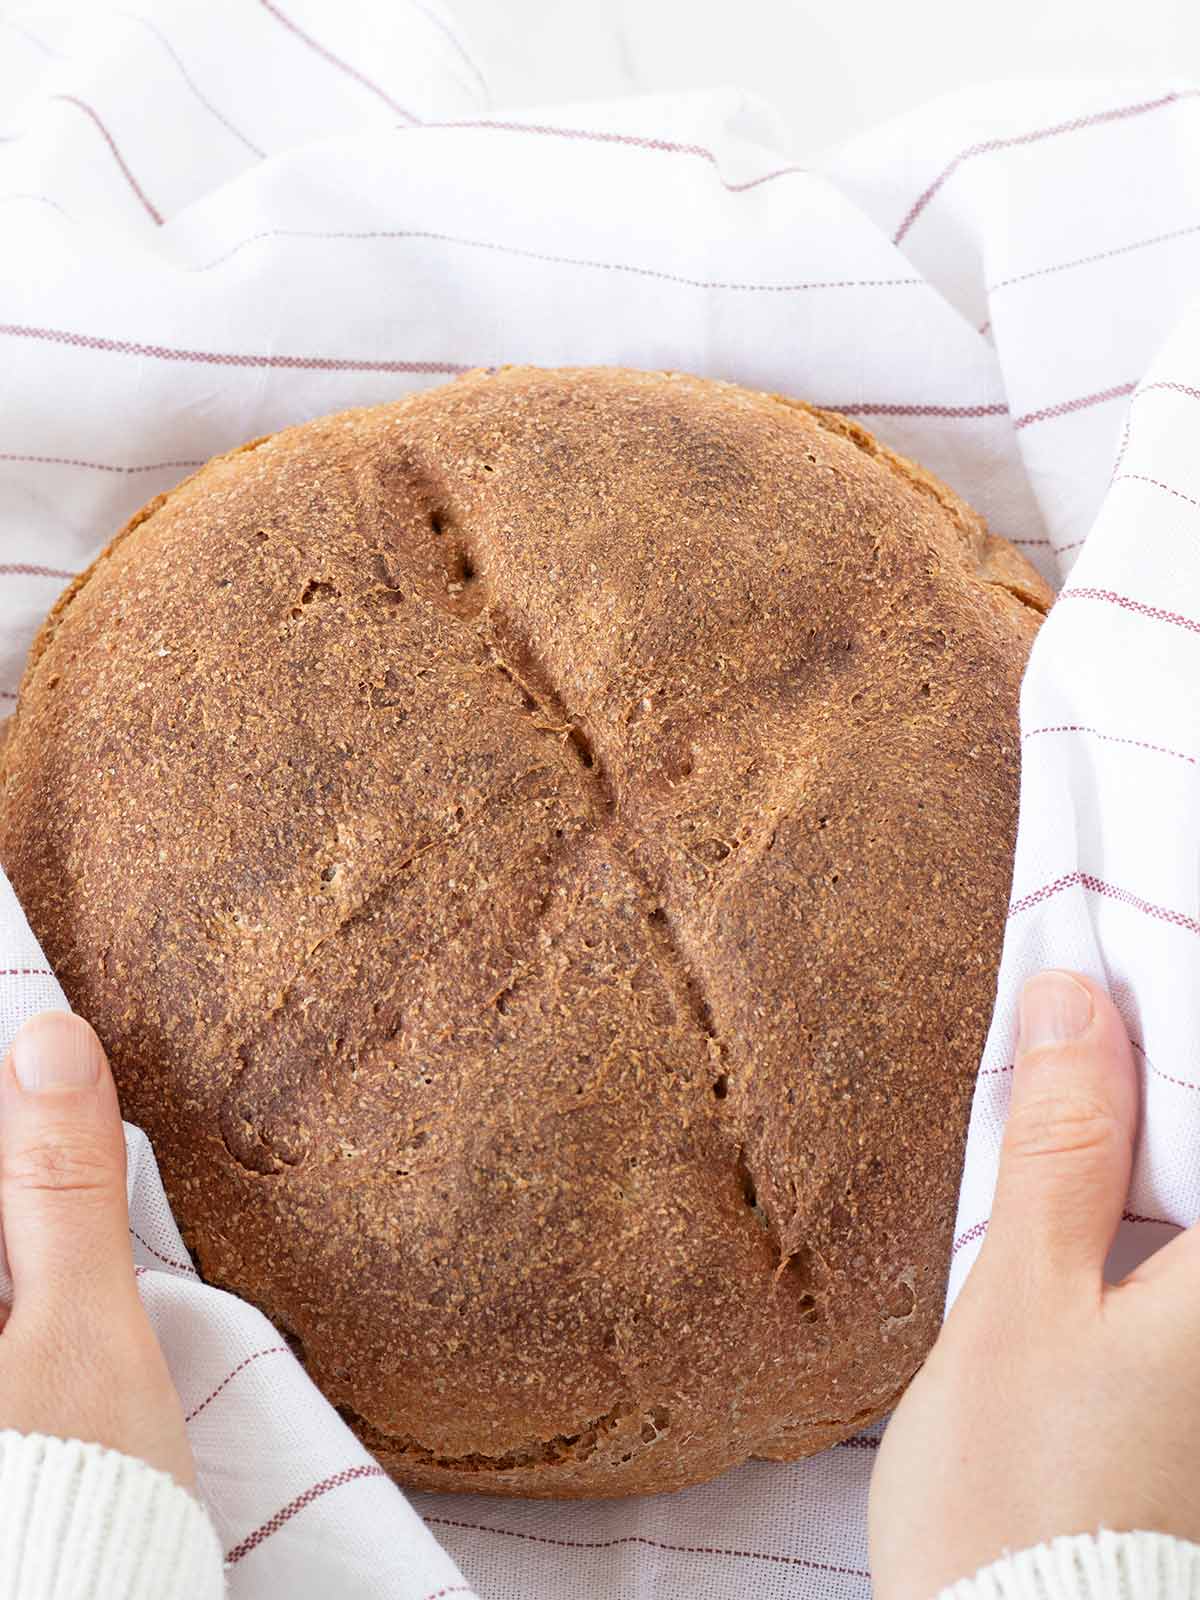
Step 6: Remove the baked bread from the oven and carefully take it out of the pan. Wrap the bread completely in a clean kitchen towel and let it cool on a wire rack or wooden surface for at least 20 minutes before slicing. This allows the crumb to set properly.
Storage
Once the bread is completely cooled, store it at room temperature in a cool, dry place. For best texture, keep it in a paper bag or a bread box for up to 5-6 days.
For longer storage, slice and freeze the bread in an airtight container or freezer bag for up to 3 months.

Marinela's Tips
- Use lukewarm water: The water should feel slightly warm to the touch-not hot. Too hot can kill the yeast, while too cold can slow down the rise.
- Use fresh yeast: If your yeast is expired or not active, the bread won't rise properly, resulting in a denser loaf.
- Don't add to much flour: Avoid adding excess flour when kneading; a slightly tacky, soft dough yields the best texture.
- Preheat the oven: Always preheat your oven before baking to ensure the bread rises properly and bakes evenly from the start.
- Use parchment paper: Lining your baking pan with parchment paper ensures the bread comes out easily and prevents it from sticking to the pan.
- Don't forget to wrap in a kitchen towel while cooling: This traps just enough moisture to keep the crust chewy, not hard, while the inside stays soft and tender.
Frequently Asked Questions (FAQ's)
Ensure your yeast is fresh and the water is at the correct temperature. If the room is too cold, try placing the dough in a warmer spot to help it rise properly.
Yes, you can freeze the dough after the first rise. Thaw it overnight in the refrigerator before shaping and baking.
You can mix in herbs like rosemary, thyme, or garlic, or even add seeds such as sunflower or sesame for extra flavor and texture.
Dense bread is usually the result of either too much flour added during kneading or not allowing the dough to rise long enough. Be sure to measure your flour correctly and allow the dough to rise until it's doubled in size.

Easy Homemade Bread Recipes
Serving Suggestions
- Spread with creamy garlicky tahini-free hummus, smoked paprika hummus, hummus with beetroot, sundried tomato spread, or wild garlic pesto for a flavorful snack.
- Serve it alongside a bowl of creamy green soup, tomato and butternut squash soup, or vegetable green peas stew for a cozy, satisfying meal.
- Enjoy the bread with a hearty vegan jackfruit patty or a refreshing garbanzo tuna salad for a tasty, plant-based lunch.
- Top the bread with dried cranberry sauce for a sweet touch or spread it with homemade cashew nut butter or peanut butter for a creamy, nutty treat.


📖 Recipe
Homemade Rustic Whole Wheat Bread Recipe
Equipment
- large mixing bowl
- 8-inch round baking pan lined with parchment paper
Ingredients
- 1 + ½ cups lukewarm water
- 3 + ½ cups whole wheat flour
- 2 +¼ teaspoons instant yeast
- 1 teaspoon salt
- 1 teaspoon sugar
Instructions
- In a large bowl, mix lukewarm water, instant yeast, salt, and sugar. Let it sit for 5 minutes until frothy-this means the yeast is active.
- Gradually stir in the flour until a shaggy dough forms. Transfer to a floured surface and knead for 5 minutes until smooth and elastic. Form a ball, place it back in the bowl, cover with plastic wrap and a kitchen towel.
- Let the dough rise at room temperature until doubled in size (about 2-3 hours). It should look bubbly and feel soft.
- Punch down the dough, knead for 2 minutes, and shape it into a ball. Place it in a parchment-lined 8-inch round pan, cut an "X" on top, cover, and let rise for 15 minutes.
- Preheat oven to 480°F (250°C). Bake for 15 minutes, then lower the heat to 300°F (150°C) and bake another 35 minutes until firm.
- Remove from the pan, wrap in a clean towel, and cool on a rack or wooden surface for at least 20 minutes before slicing.
Notes
- Once fully cooled, store the bread in a cool, dry place in a paper bag or bread box. It stays fresh for 5-6 days with a great chewy crust.
- For longer storage, slice the loaf and freeze in an airtight container or freezer bag for up to 3 months.
- The water should be slightly warm-not hot-to activate the yeast without killing it.
- Expired or inactive yeast won't rise well and can leave your loaf dense.
- A soft, slightly tacky dough makes for the best texture-resist the urge to add too much flour when kneading.
- Make sure your oven is fully preheated before baking for an even rise and perfect crust.
- Line your baking pan to prevent sticking and make cleanup easier.
- After baking, wrap the bread in a clean kitchen towel to trap just enough moisture. This keeps the crust chewy while the inside stays soft and tender.
Nutrition
If you try this crusty whole wheat bread, let me know! Leave a comment, rate it, and don't forget to tag a photo @go_eatgreen on Instagram.
HUNGRY FOR MORE? Subscribe to my newsletter and follow along on Facebook, Pinterest, and Instagram for all of the latest updates.


Comments
No Comments